
CH 03 · Install and Launch
Chapter Goal
This chapter gets dsh running from zero: confirm/install Node.js, then a one-command Web UI launch, then complete the first-time setup (model key + workspace), and finally send your first real task. Once you've done that, you're officially in.
Before Hands-on: You Only Need Two Things
- Node.js — dsh runs on Node; this is the only environment dependency. No database, no Java to configure.
- A DeepSeek API Key — dsh itself is free and open-source, but calling the model costs money. Go to the DeepSeek Open Platform, register and log in, then on the left sidebar "API Keys" → Create, copy and save it. The Key is shown in full only once, in the
sk-prefix long string format; store it somewhere safe before closing the page.
Step 1: Check Local Node.js
Open a terminal (on Windows press Win + R, type cmd, hit Enter), and type:
node --version
npm --version
If you see version numbers, you're set. dsh has Node version requirements: the official declaration is ^22.19 || >=24. In plain words: Node 22.x at 22.19 or above, or Node 24 and above. In other words: older 22.x before 22.19, and odd versions like Node 23, are not supported and will fail to launch.
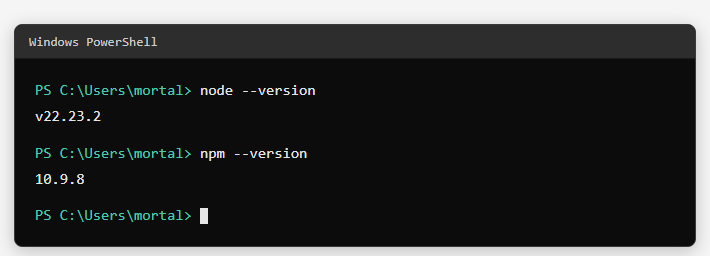
If, like me, you already had Node installed and the version meets the requirement, skip to step 3.
Step 2: No Node.js? Install One (Windows)
Open the Node.js website, download the LTS version's Windows installer (.msi, 64-bit), double-click and Next all the way. By default it also installs npm and adds them to the system PATH.
After installing, remember to reopen the terminal before re-verifying — many "I just installed it but the command can't be found" issues are just environment variables not being refreshed:
node --version
npm --version
Step 3: Switch npm to a China Mirror (Optional but Recommended)
Directly pulling npm packages in China is often slow or times out. Switching to the Taobao mirror helps a lot:
npm config set registry https://registry.npmmirror.com
npm config get registry
If you see https://registry.npmmirror.com, it's in effect.
Step 4: Install and Launch dsh
This tutorial uses a global npm install: one command to install, then the
dshcommand is available anywhere without re-downloading on site — easiest for newcomers.
Install the global package:
npm install -g @deepseek-ai/dshAfter installing, verify the version:
dsh --versionThen launch the Web UI:
dsh webThe first run will spend a minute or two downloading dependencies, with a bunch of logs scrolling in the terminal — that's normal. When you see something like the following, it's up:
dsh web: http://127.0.0.1:3080
dsh web: opening the default browser; pass --no-open to disable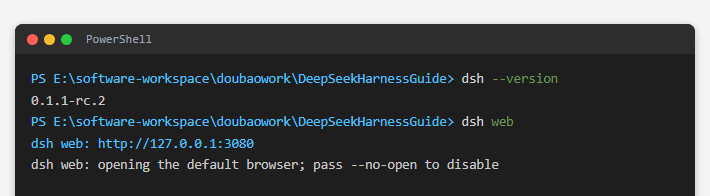
To update to the latest version (global installs don't auto-update; do it manually):
npm install -g @deepseek-ai/dsh@latestStep 5: Open the Web UI
The first time you run dsh web, it will automatically open the browser to the interface. If it doesn't pop up automatically, manually open the browser and visit:
http://127.0.0.1:3080This is the local loopback address; it only works on this machine and is not exposed to the outside network.
The first time you open it, a beta notice pops up — DeepSeek Harness 0.1 is still a developer-facing test version and will keep iterating rapidly. Click Continue to enter the main interface.
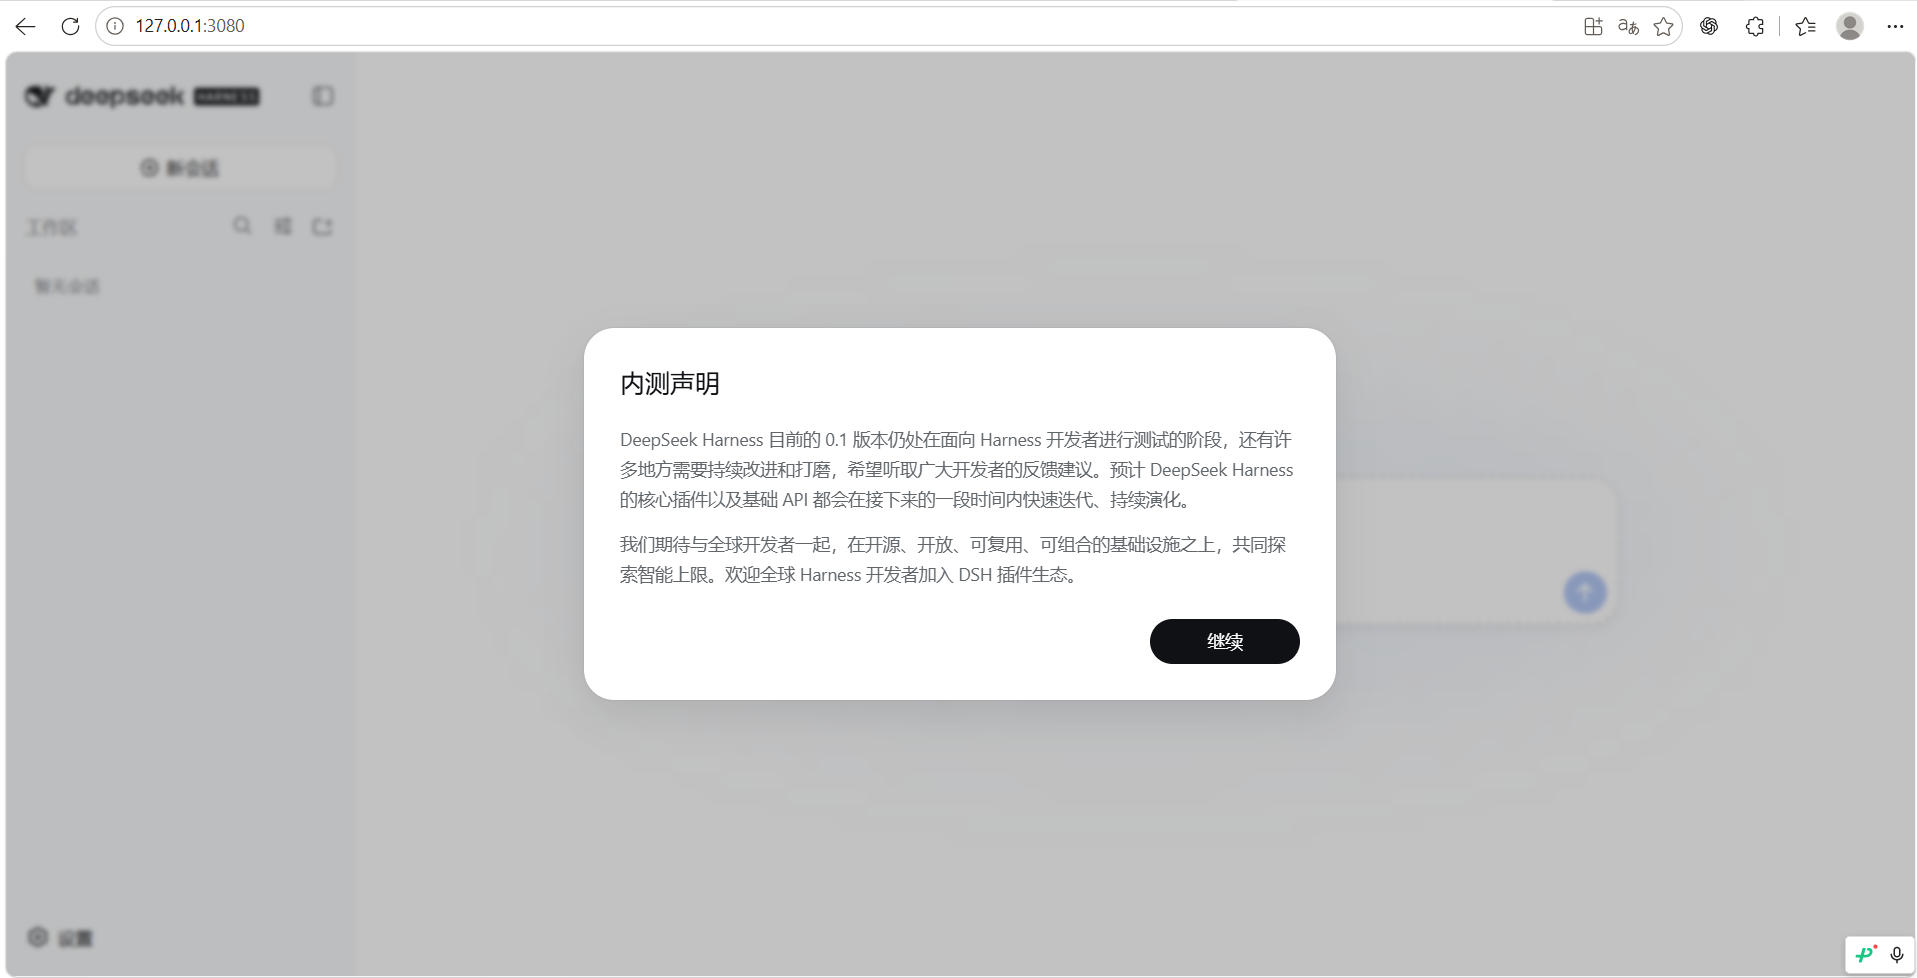
Step 6: First-Time Setup (Key + Workspace)
6.1 Fill in the API Key After clicking Continue in the previous step, dsh will directly pop up an "Add an API Key to get started" guide — paste your sk--prefixed key into the input box and click Save and Continue. (To change the Key or switch the model later, go to the Settings button at the bottom left → Models.)
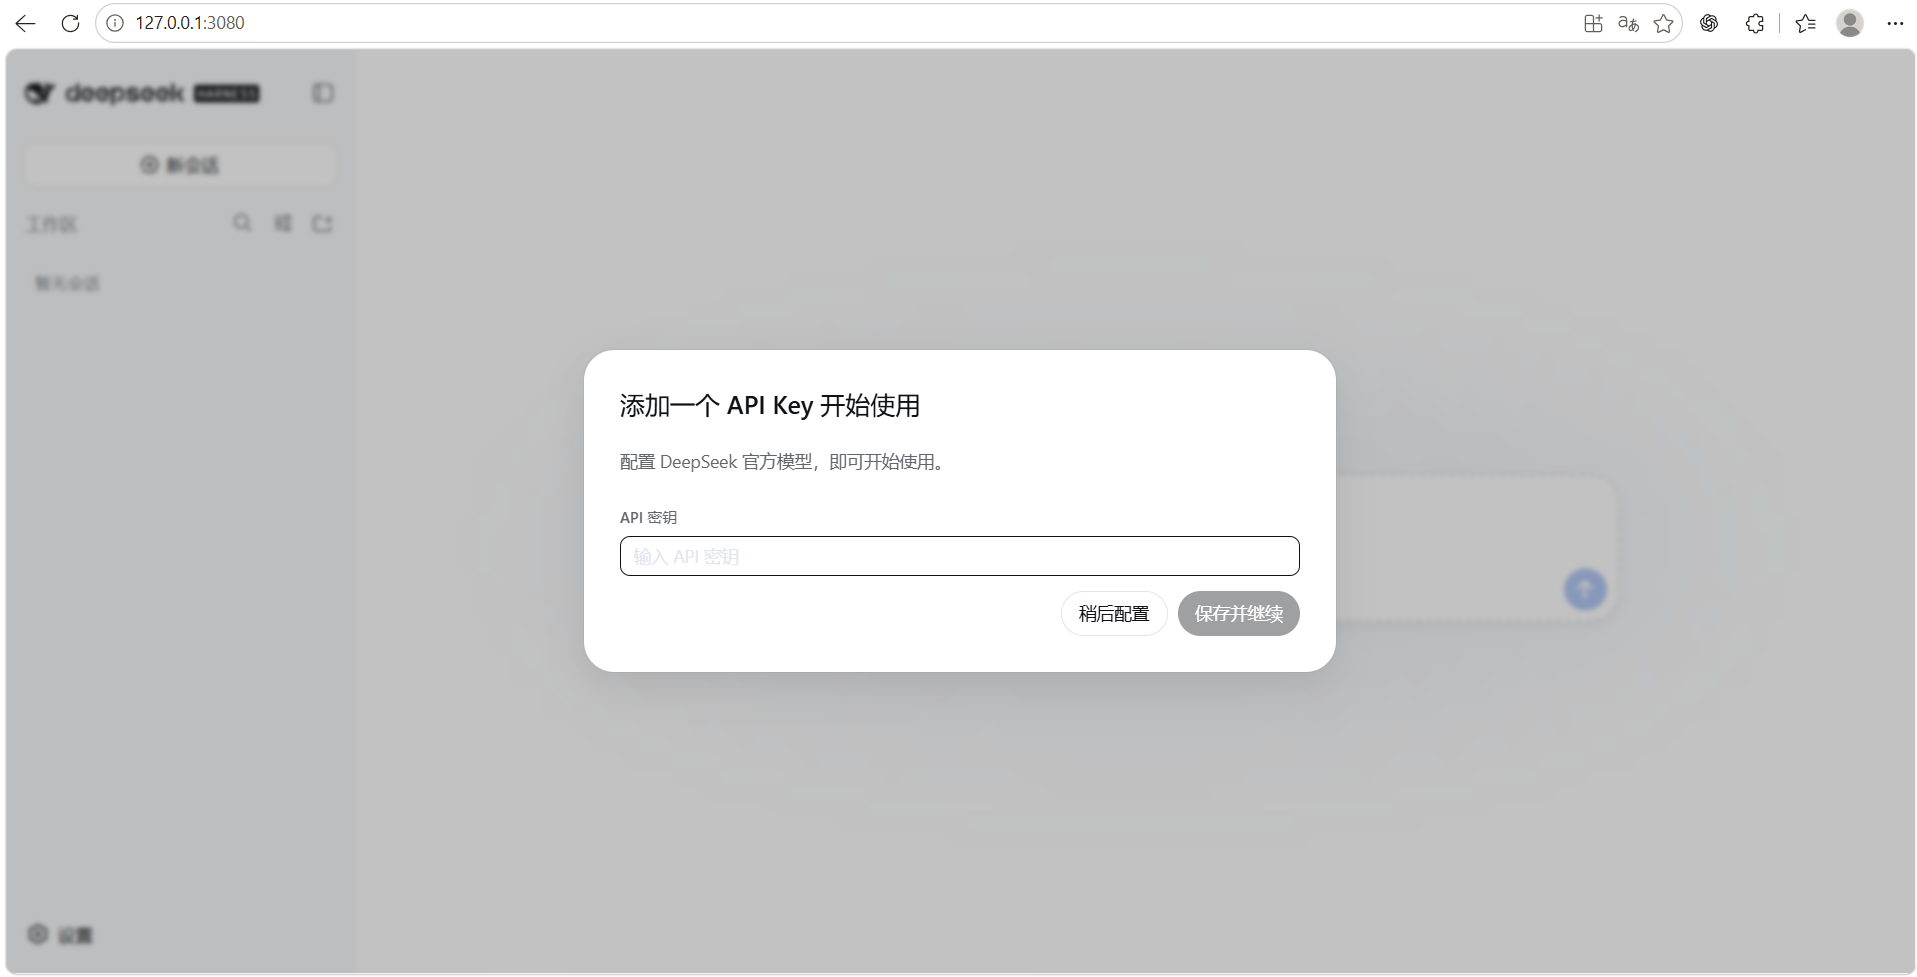
The Key is only written locally to
C:\Users\<your-username>\.dsh\.credentials.yaml; the UI never displays the plaintext. Don't take screenshots and share them.
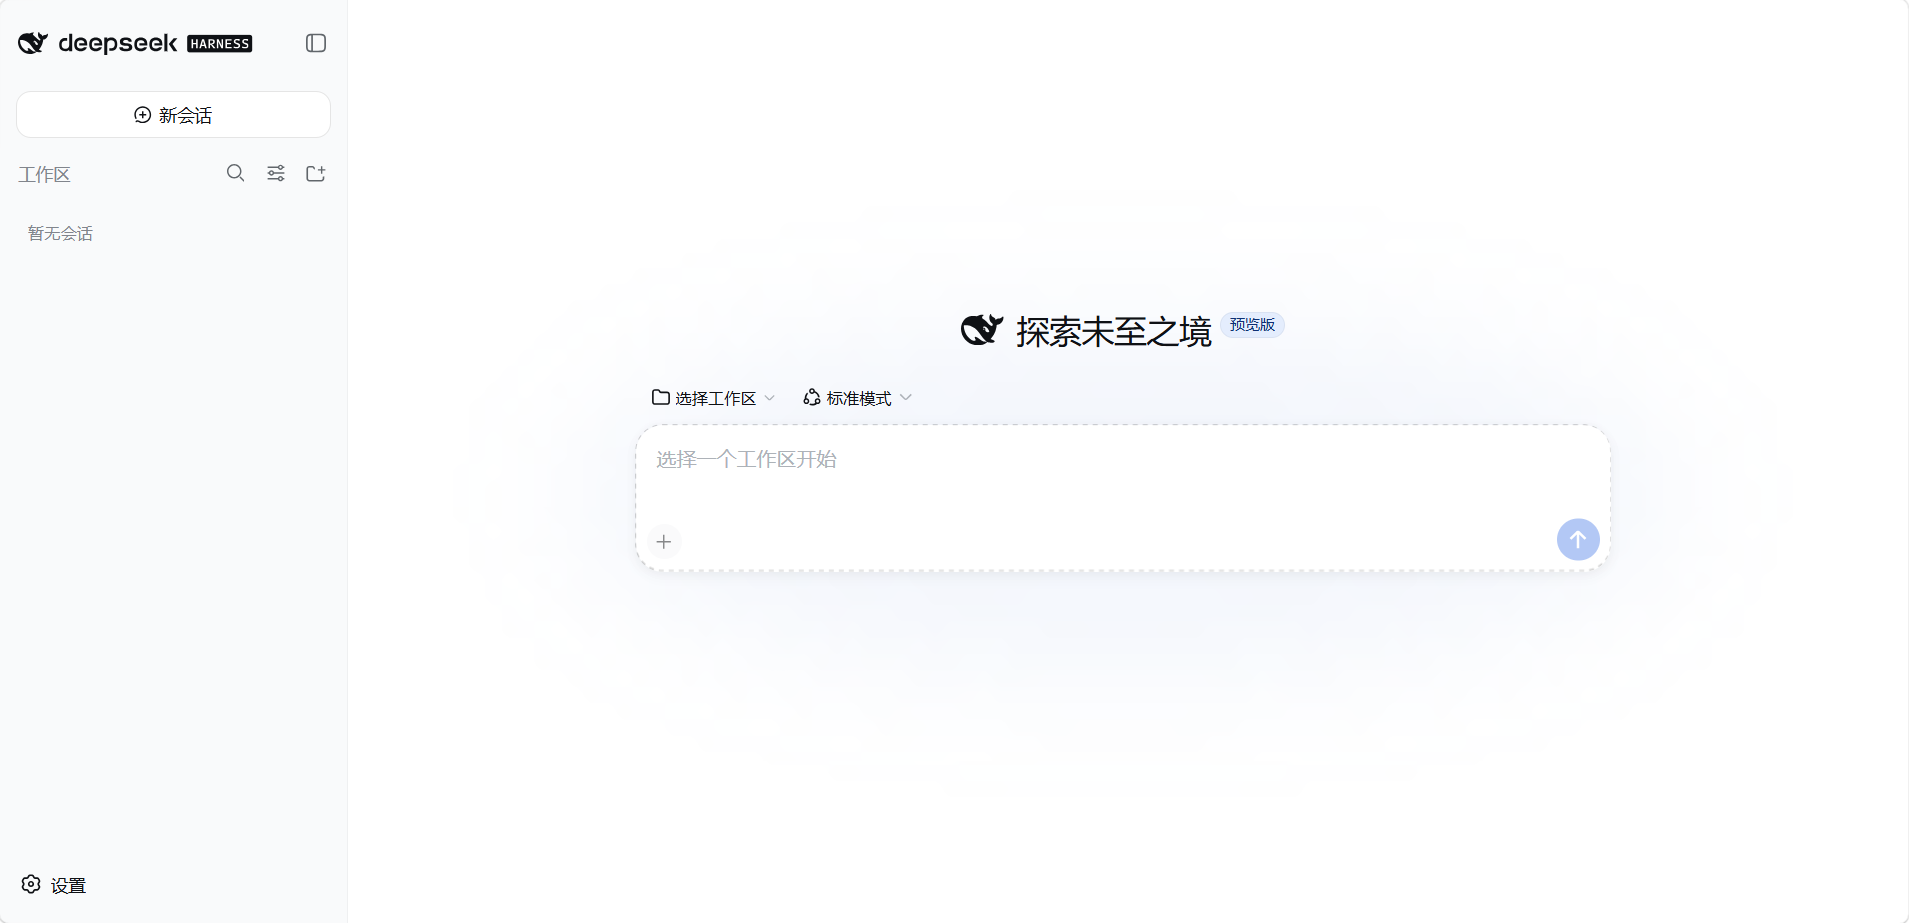
6.2 Pick a workspace After filling in the Key, you enter the main interface. Click the Choose workspace dropdown and pick a directory where you want the Agent to work (e.g. your project folder). Until a workspace is selected, the input box at the bottom will keep saying "Pick a workspace to start" — this is by design: without telling the Agent where to work, it won't dare act.
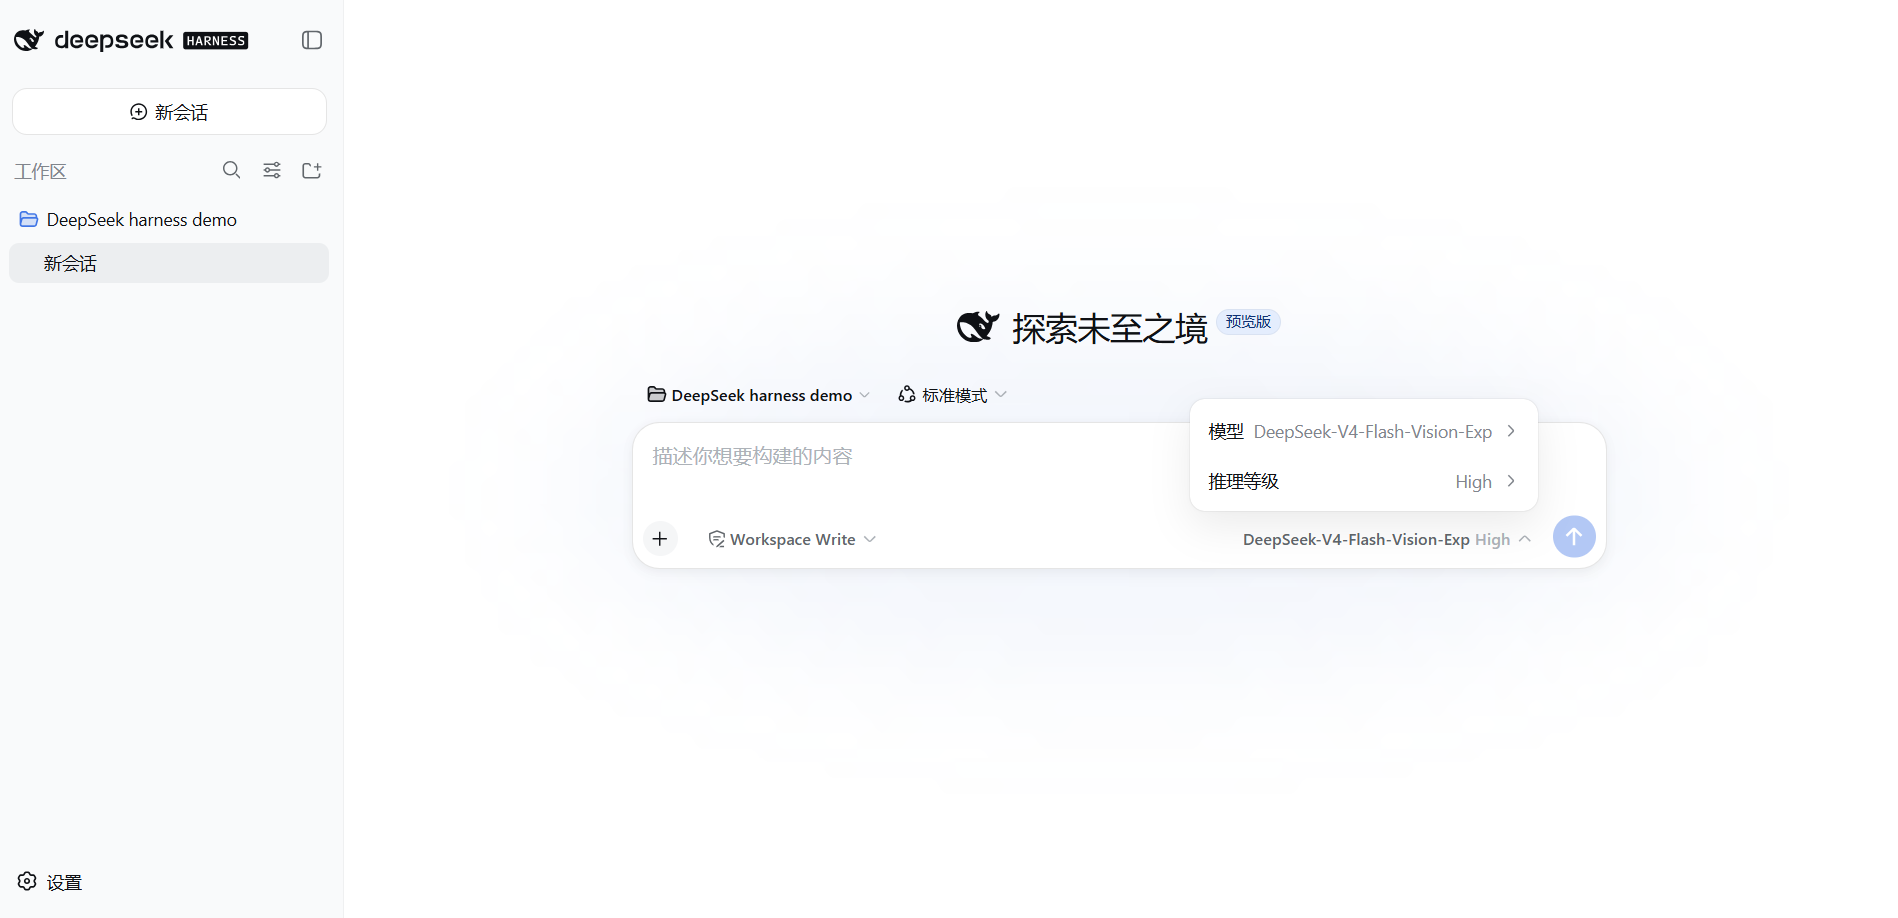
6.3 Pick a model and permission (set before sending the first task) After selecting a workspace, a model picker pops up at the bottom right; you'll see the three DeepSeek models:
| Model ID | Positioning |
|---|---|
deepseek-v4-pro | Flagship — strongest but most expensive |
deepseek-v4-flash | Fast, high cost-performance |
deepseek-v4-flash-vision-exp | Multimodal vision version: can read images, see screenshots, analyze charts; on par with flash for pure text, significantly ahead in multimodal |
deepseek-v4-flash-vision-exp is the first vision model in the DeepSeek V4 family (experimental, API launched August 21, 2026; weights open-sourced August 31). It can read images, see screenshots, analyze charts, and run normal text tasks too. All demos in this book use this model — select it in the panel, pick a reasoning effort (default High is fine), save, and it takes effect immediately; no restart needed.
On the left of the input box there's also a permission selector (showing Workspace Write in the screenshot), which determines what the Agent can touch on your computer — keep the default for now. The detailed differences between these options (what each of the three permission levels can do, how to pick a reasoning effort) are covered in CH 05 when we go through the interface.
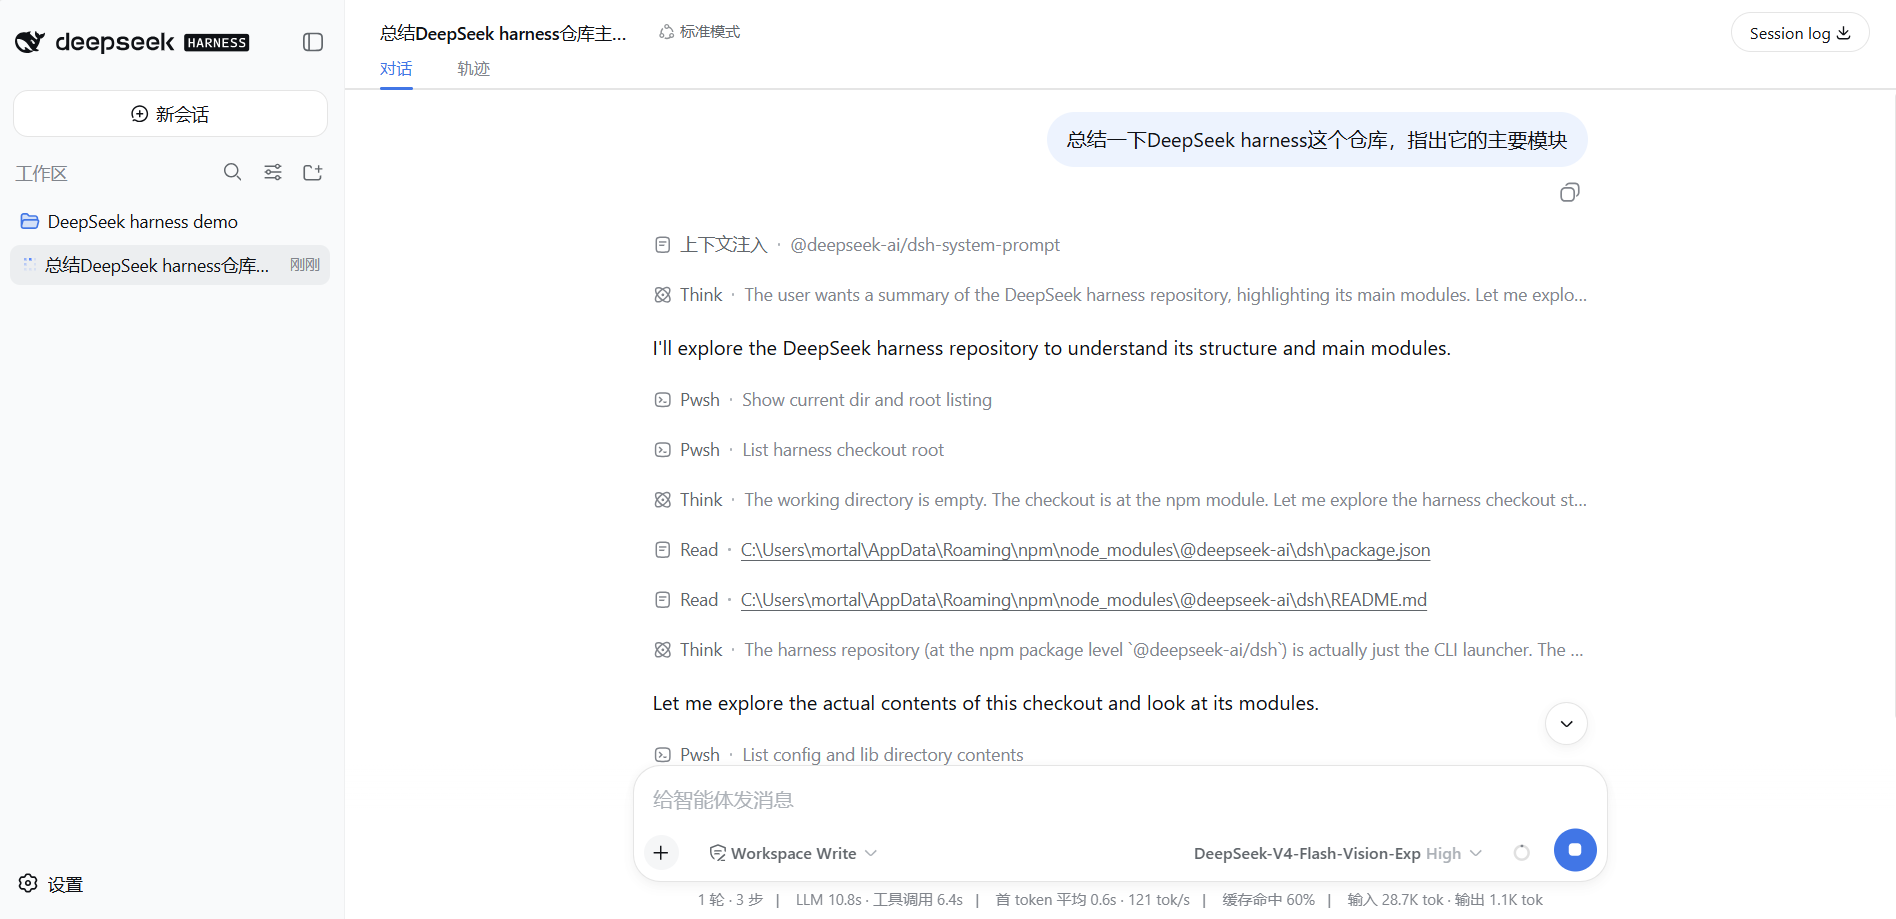
Step 7: Run Your First Task
Create a new session and type a sentence, for example:
Summarize the DeepSeek harness repository and identify its main modules.
The Agent will start reading files, running commands, and maintaining a plan, with every tool call laid out in the interface — the screenshot shows the full execution chain Context injection → Think → Pwsh → Read. For sensitive operations, it pops up an approval dialog according to the current permission policy. In the top-left of the interface there are two tabs, Conversation / Trajectory; the Trajectory is the same Trajectory mentioned in CH 02, and we'll cover it later.
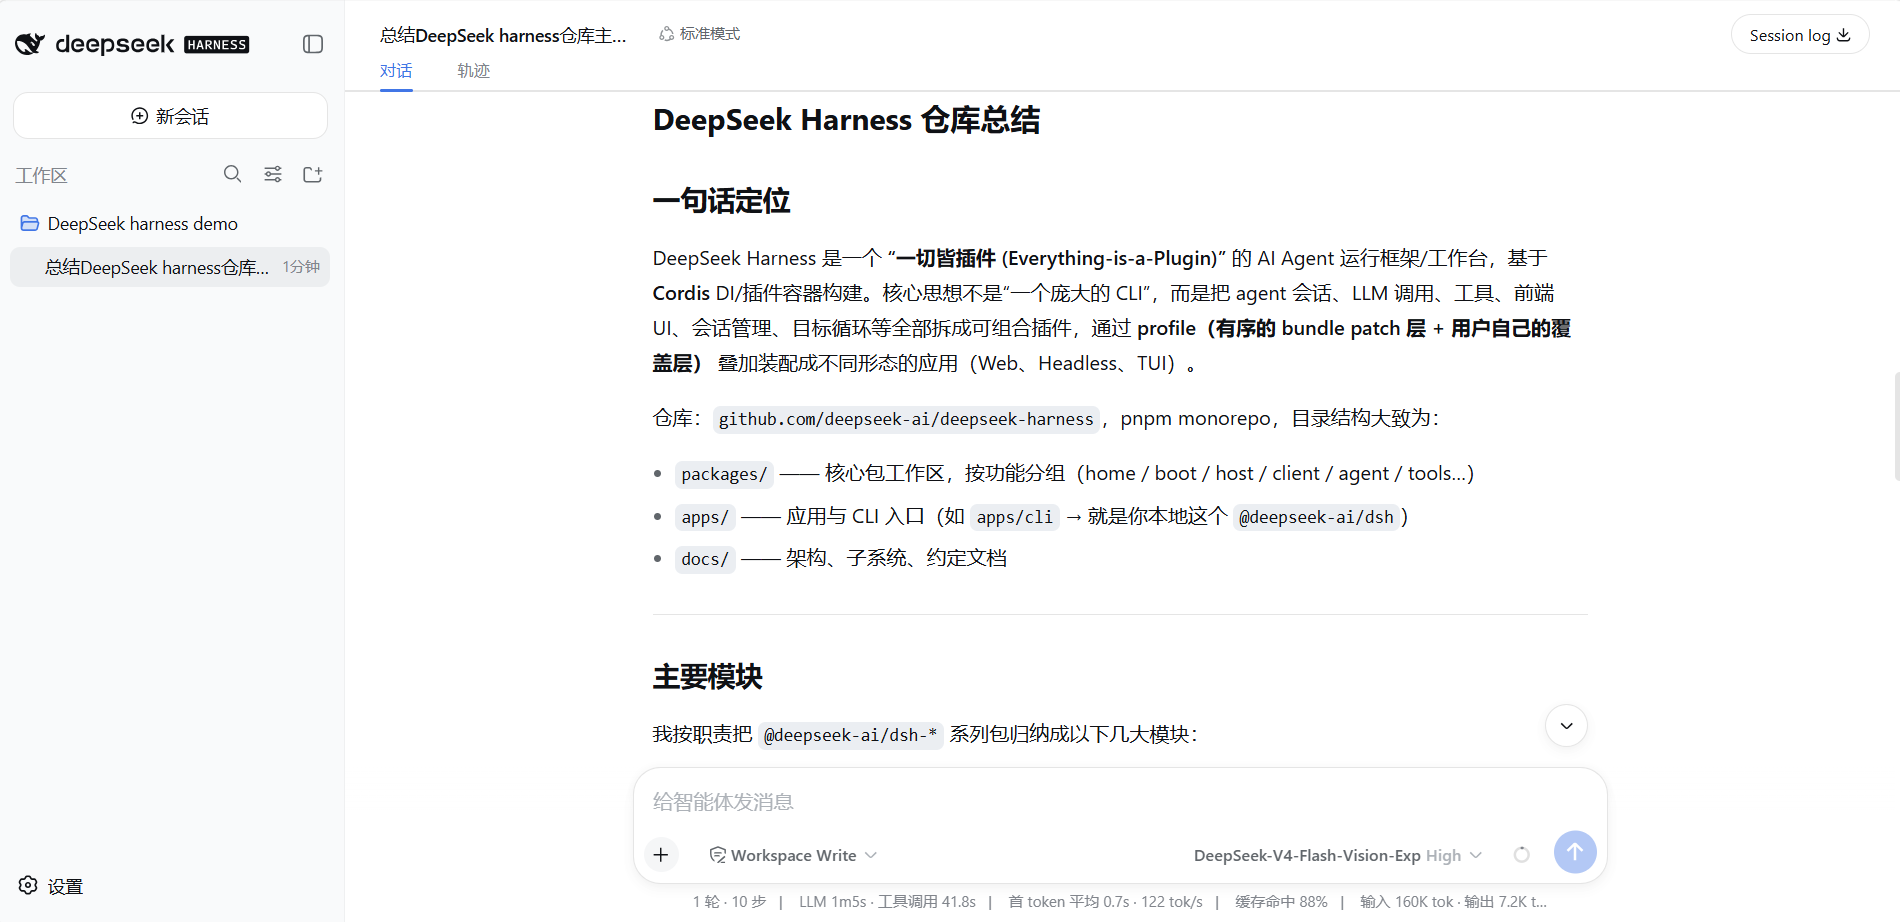
After it finishes, you get a complete summary — my answer this time was titled "DeepSeek Harness Repository Summary": the one-liner positioning is "Everything is a plugin AI Agent runtime framework / workbench, built on Cordis", and it also walked through the repo's packages/apps/docs directory structure and the main modules of the dsh-* package series.
Once you've cleared this step, you're officially in.
Advanced Usage
Change port (when 3080 is occupied): use the following command instead of dsh web at launch —
dsh web --port 8080Then visit http://127.0.0.1:8080.
One-shot command line task (headless):
dsh --profile headless "Run the tests in the current directory and summarize the results"It prints the result and exits, suited for scripts and CI. The full headless playbook (multiple entry points, CLI parameters, real hands-on) is covered in CH 06.
View the actually effective configuration tree (very useful for troubleshooting):
dsh web --dump-configCommon Troubleshooting
| Symptom | Resolution |
|---|---|
node is not an internal or external command | Node isn't installed properly, or the terminal wasn't reopened. Reopen PowerShell and try again |
| Node version ... is not supported | Version below 22.19, or Node 23. Upgrade to 22.19+ / 24 |
| First install hangs or download fails | Network issue. Set up the npmmirror registry first and retry |
| Port 3080 occupied | Change port: dsh web --port 8080 |
| Page won't open | Confirm the terminal where the launch command runs is still open; the address is http://127.0.0.1:3080 |
Reports MISSING_CREDENTIAL | No API Key stored (go to Settings → Models to add one) or the window wasn't reopened |
Reports UNKNOWN_MODEL | A model not configured was selected; add the model ID under a custom provider |
| Native compile errors (e.g. node-pty) | On Windows, install Visual Studio Build Tools (with C++ components) |
Safety reminder: your API Key is your wallet. Don't screenshot it into a group chat or commit it to a Git repo. If you suspect it's leaked, go to the platform and revoke and recreate it; the old Key immediately becomes invalid.
What you learned in this chapter
You pass if you can complete the items below:
- [ ] Use
node --versionto confirm Node is at 22.19+ / 24+ (if not, install as in step 1) - [ ] Install dsh with
npm install -g @deepseek-ai/dsh, launch withdsh web, and openhttp://127.0.0.1:3080 - [ ] Complete the first-time setup: Settings → Models with the API Key, and pick a workspace
- [ ] Send your first real task successfully and see the Agent at work