CH 27 · Deployment Options
Chapter Goal
You've been using dsh web locally to run dsh — that's the most common form, but not the only one. dsh mainly has four ways to run, each suited to different scenarios:
- Local Web UI: what the previous tutorials have been demonstrating
- Headless CLI: no interface needed, a single command runs a task and exits, suited for scripts and CI
- Python SDK: embed dsh into your own Python program, the Agent becomes a function call in your code
- Docker containerized: install dsh in a container running on a server, suited for team sharing — this chapter will give a complete deployment tutorial
After reading you'll know: which way to use for your needs, rather than only knowing dsh web.
First Clarify: Why dsh Has Multiple Forms
Going back to the "everything is a plugin" from CH 08 — dsh's core is @deepseek-ai/dsh-base (model adapter, tools, persistence, sandbox, approval etc. low-level capabilities), and stacking different bundles on top of it becomes different forms:
| Stacked bundle | Becomes | How to start |
|---|---|---|
@deepseek-ai/dsh-web-app | Web UI with browser interface | dsh web |
@deepseek-ai/dsh-headless | No interface, run-and-exit command line | dsh --profile headless "task" |
| Python SDK wrapper | Embed into Python programs | pip install deepseek-harness-sdk |
| Any of the above containerized | Long-running on a server | docker compose up -d |
Same foundation, four ways to wear it. This is "everything is a plugin" once again — the form itself is a combination of bundles.
Form One: Local Web UI
What CH 03 to CH 04 have been demonstrating is this. dsh web to start, browser opens http://127.0.0.1:3080, sessions, plugins, keys all stored locally.
Suited for personal daily use, debugging plugins, beginners. The limitation is the computer must be on to use — turn the computer off and the Agent stops, not suited for scenarios needing 7x24 online, or letting others access anytime.
Form Two: Headless CLI
CH 05 already hands-on covered it. No interface, give a task, run it, output the result, exit.
dsh --profile headless "Summarize the current directory's README into three sentences"Suited for scripts, CI/CD, scheduled tasks (the one in CH 15 that scrapes AI hot-topics every day uses this), batch processing. Not suited for scenarios needing multi-turn dialogue.
A boundary: each headless call is an independent session, ends when done. To reuse context you need Python SDK, or write file-based handoff.
Form Three: Python SDK
Turn dsh into a library in Python code, the Agent is a function call. pip install deepseek-harness-sdk to install, the SDK comes with a Node runtime, the target machine doesn't need to install Node separately.
from deepseek_harness_sdk import DeepSeekHarness

dsh = DeepSeekHarness()
result = dsh.run("List the current directory's files, skip node_modules")
print(result.last_message)
Suited for embedding Agent into your own product, needing fine-grained session control (reuse, event listening, streaming output), batch tasks sharing context. Not suited for just wanting to quickly run a task (headless one command is enough).
A detail: the SDK and Web UI are two independent instances, can't share a running Web UI, each has its own DSH_HOME.
Form Four: Docker Container (Full Deployment Tutorial)
Install dsh in a Docker container, running on a server, suited for long-term running and team sharing.
Before going to the server, a few words: if you don't have a server, Tencent Cloud's new user activities often have low-cost lightweight application servers, just over 100 yuan per year, more than enough for dsh. Also Tencent Cloud now supports selecting DeepSeek Harness image directly when creating instances, those who like tinkering can study it themselves. Below demonstrates the complete deployment flow using a mature community open-source project.
deepseek-harness-web-docker packages dsh + Caddy (reverse proxy + Basic Auth authentication) into one container, ready out of the box, data persisted, and auto health-check.
What Problem Does This Project Solve
Three pain points with using the official dsh web directly on a server:
- No authentication — dsh Web UI has no login mechanism by default, public deployment is equivalent to running naked
- Only listens on loopback — default
127.0.0.1, need to change config to allow external access - Environment management is annoying — Node version, dependencies, data directories all need to be managed yourself
This project uses Caddy as reverse proxy, adds Basic Auth (username/password login), dsh only listens on loopback inside the container, external requests must go through Caddy authentication to get in. Data is all mounted to the host's ./data directory, delete the container and don't lose data.
Step 1: Prepare
A Linux server (2-core 2G starting), with the BaoTa (BT) panel installed. BaoTa AI needs to have the model configured first to use — go to the left menu AI → top Settings → click Add Custom Model, fill in your model API Key.
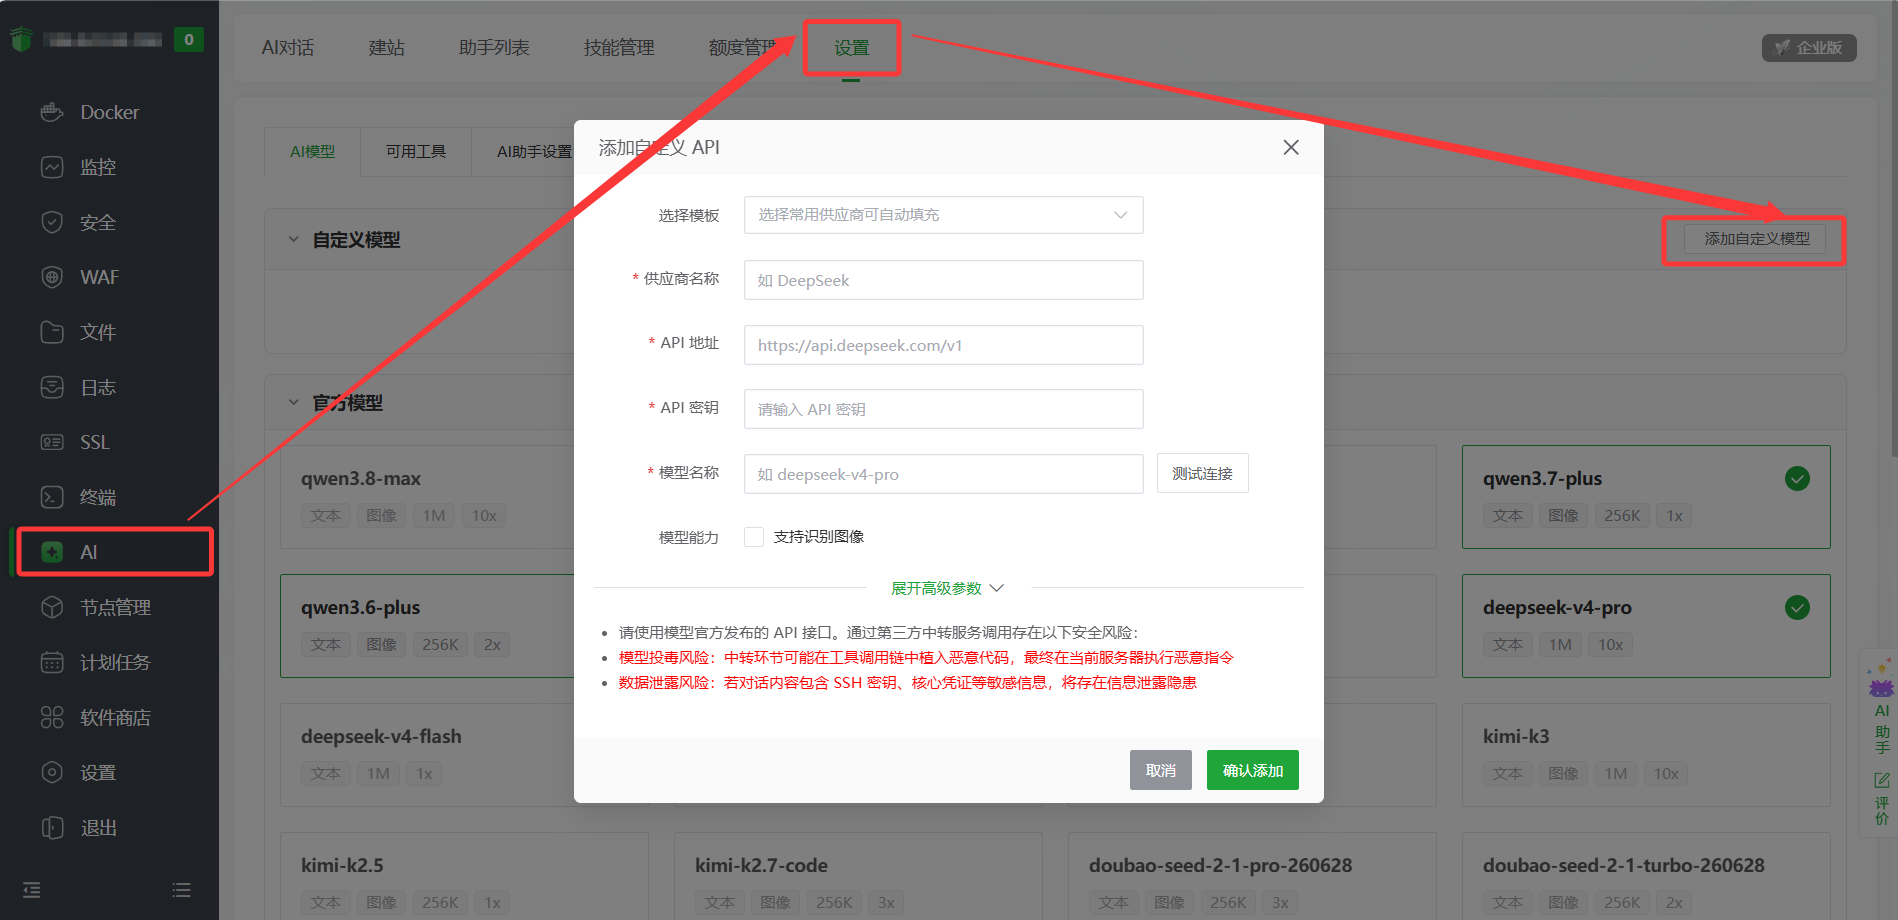
After configuring the model, BaoTa AI can help you execute commands.
Step 2: BaoTa AI One-Click Deployment
Click AI in the left menu of BaoTa panel, send the following prompt to it:
Help me deploy DeepSeek Harness Web Docker, do this in order:
1. Confirm Docker and Docker Compose are installed, install if not
2. Project address is https://github.com/Xidong-AI/deepseek-harness-web-docker
3. Enter the project directory, cp .env.example .env
4. Edit .env: DSH_AUTH_USER=admin, DSH_AUTH_PASSWORD set a strong password, DEEPSEEK_API_KEY etc. tell me the file path before starting I'll fill it in myself
5. docker compose up -d to start
6. Give me a summary after verification
BaoTa AI will help you. When it gets to step 4, it will configure everything in the .env file except the API Key, then tell you the file path so you can fill in DEEPSEEK_API_KEY yourself:
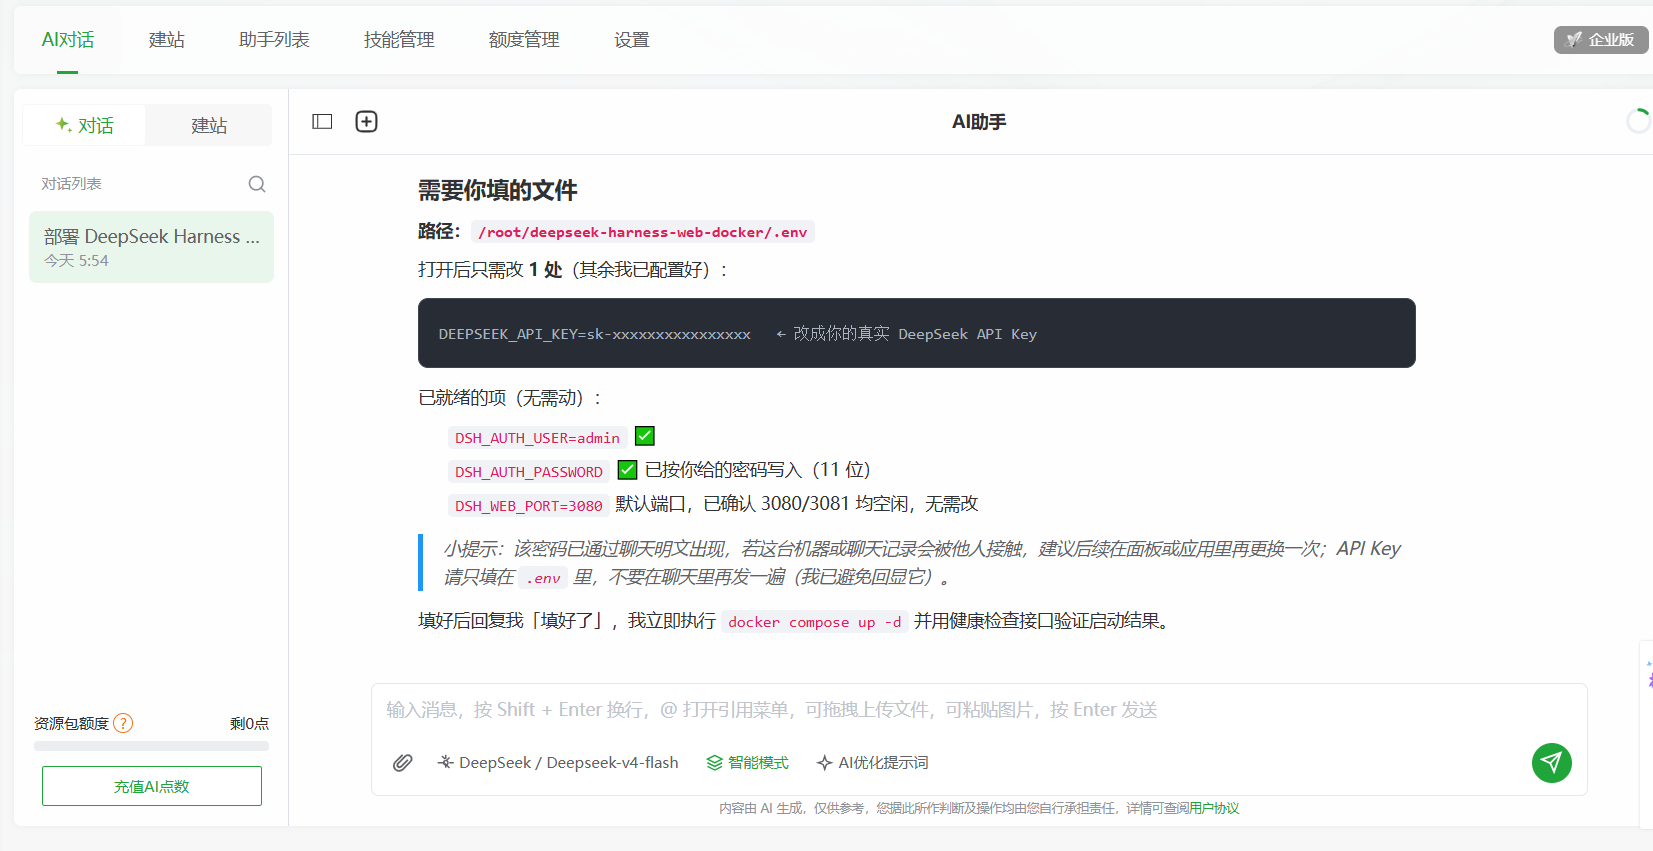
After filling in, reply "Done", and AI will continue with docker compose up -d to start, then do health check verification, and finally give you a complete summary:
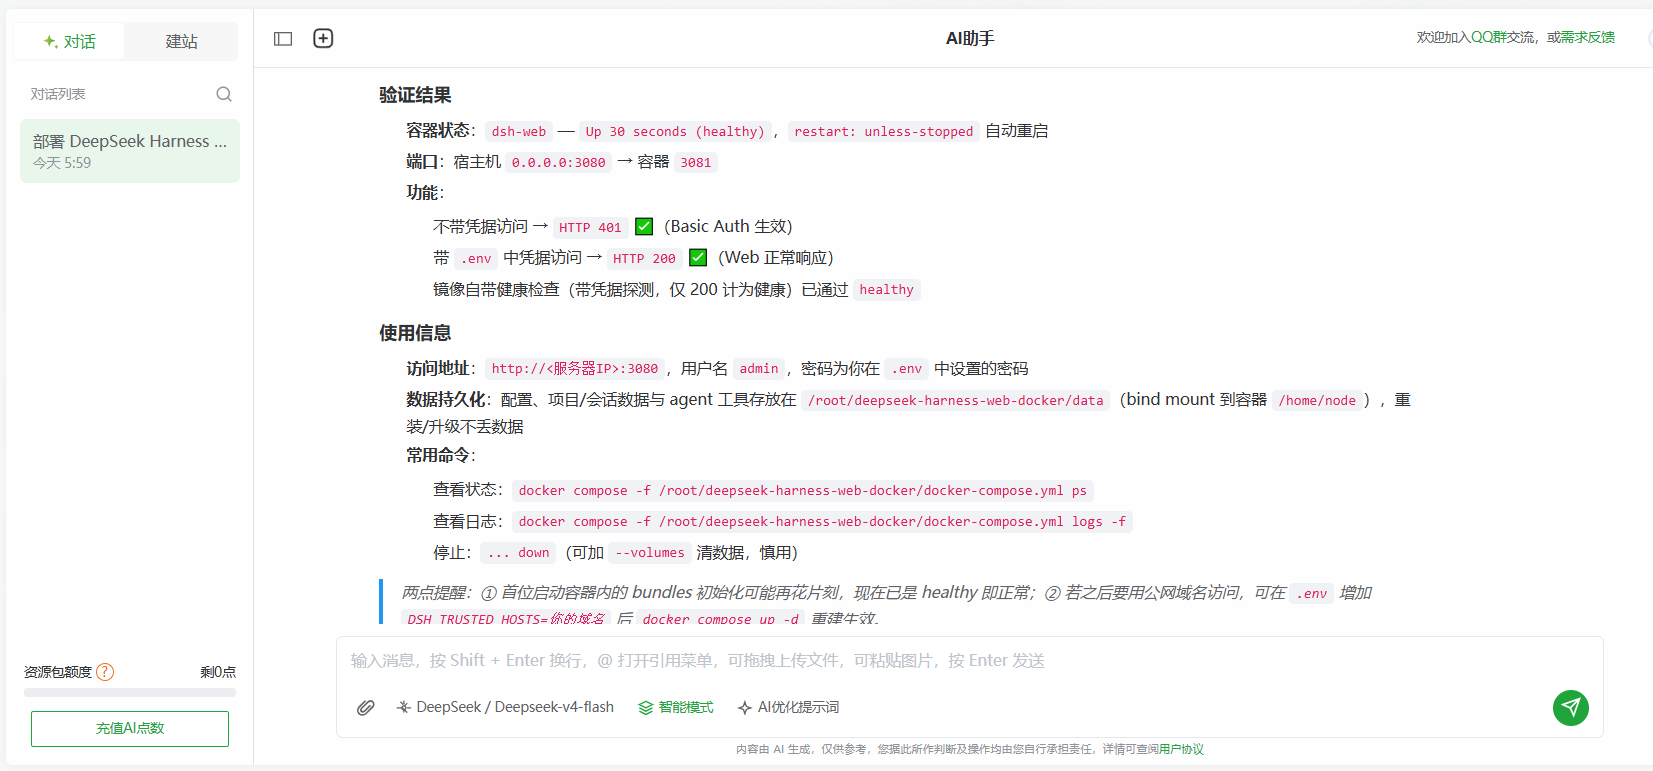
When the container status is healthy and Basic Auth is in effect (returns 401 without credentials), the deployment is successful.
Step 3: Access
Open http://server-IP:3080 in the browser, a Basic Auth login box will pop up, enter the username and password you set in .env, and you can enter the dsh Web UI.
Note that the browser top-left will show "Not Secure" — this is because the current protocol is HTTP, no SSL certificate, not a problem with dsh itself. Production deployment should bind a domain + HTTPS (next step).
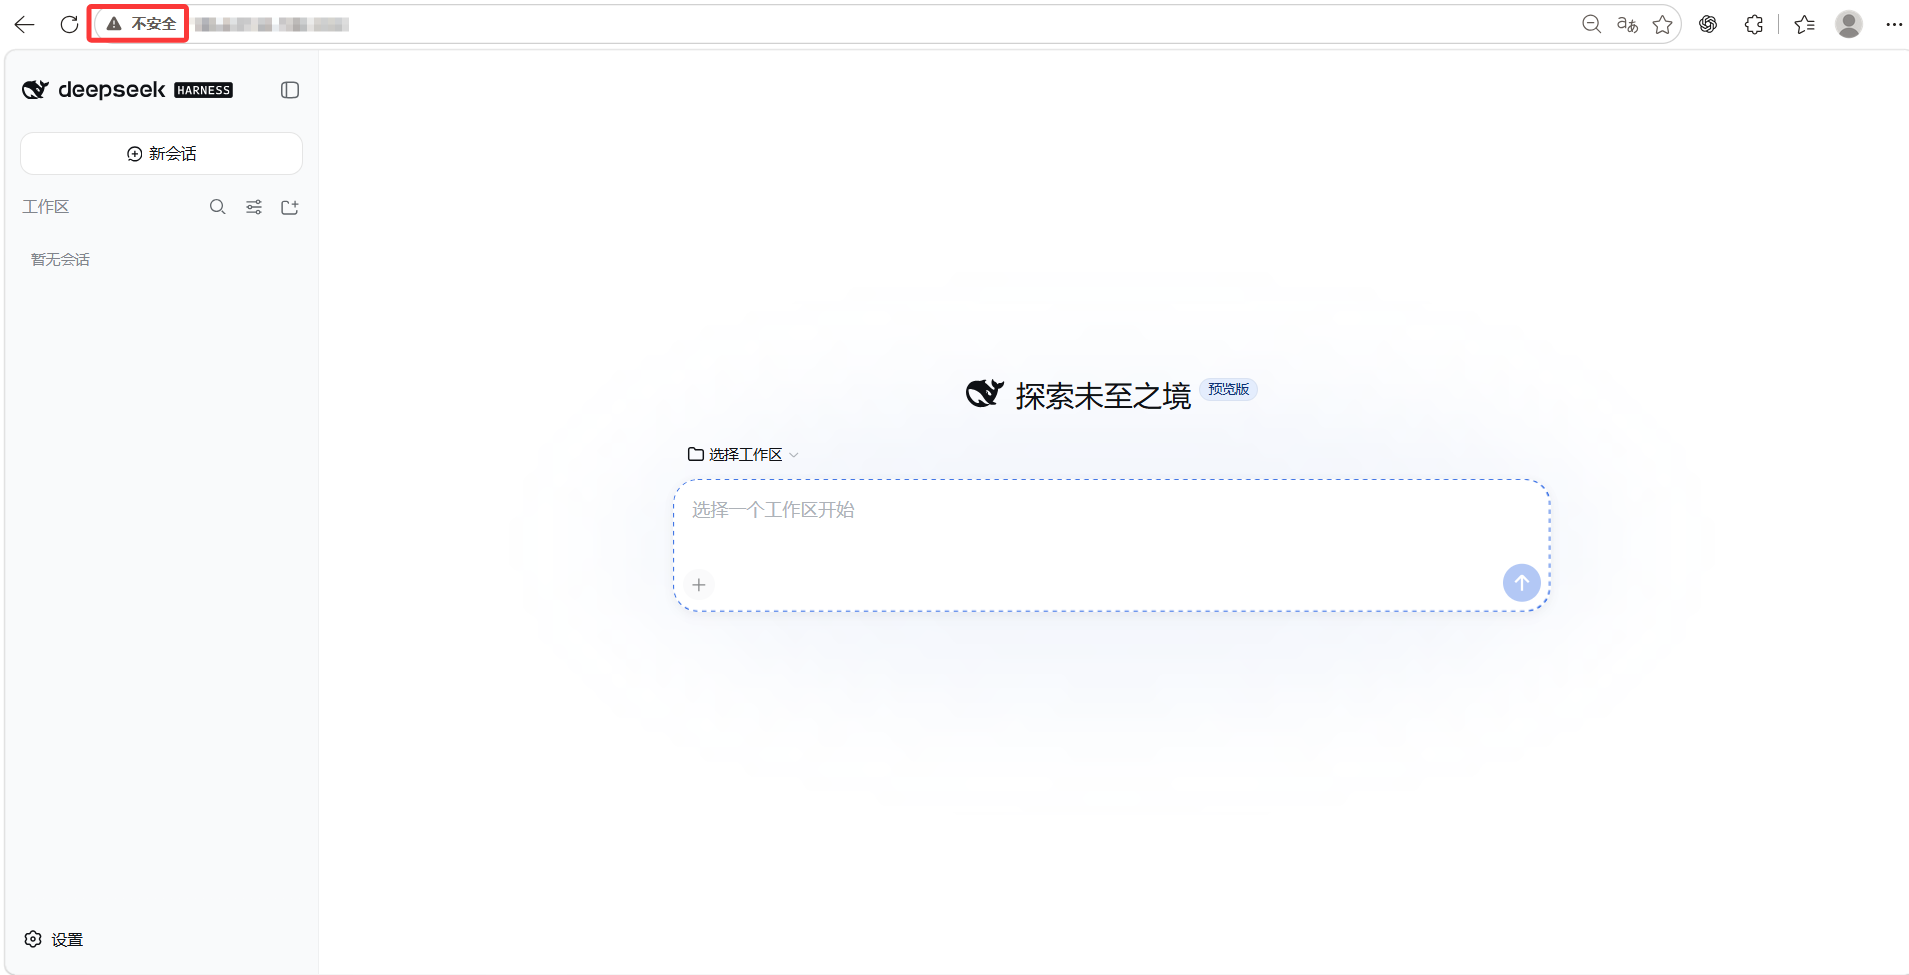
After entering, it's the same as using dsh locally — pick a workspace, send messages.
Step 4: Bind a Domain + HTTPS
Production environments must bind a domain + HTTPS to work properly. If you access directly via http://server-IP, you'll get this error when picking a workspace:
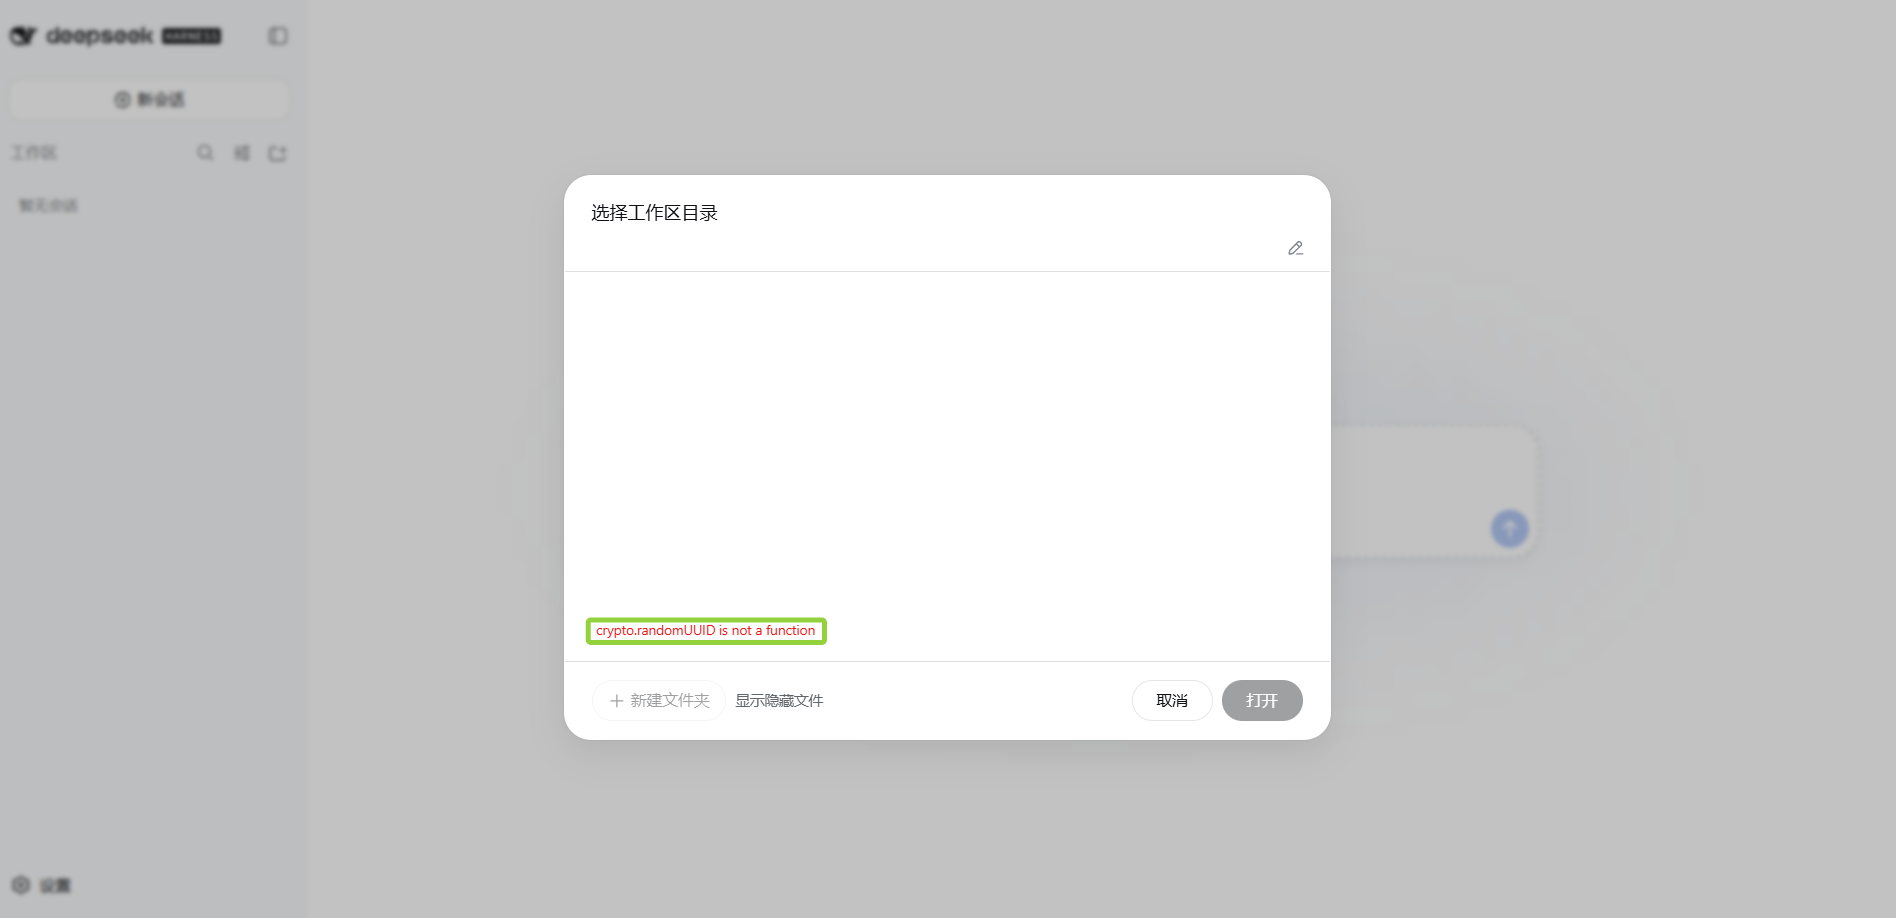
The reason is crypto.randomUUID() is a browser Web API; the standard says it's only available in a secure context — i.e. https:// pages, or localhost/127.0.0.1. Accessing via http://IP is an insecure context, this function is undefined, the front-end throws crypto.randomUUID is not a function the moment it creates a session or picks a workspace.
So binding a domain + HTTPS is not an optional optimization, it's required.
Prerequisite: first go to your domain management console (Tencent Cloud DNSPod, Alibaba Cloud Wanwang, etc.), add an A record for your domain, pointing to your server's public IP. Wait a few minutes for the resolution to take effect.
Continue the conversation you just had (no need to start a new one), send the following to BaoTa AI:
Help me bind a domain to the dsh I just deployed and apply for an SSL certificate and configure it for me
1. The domain is your-domain, already resolved to this server
2. Verify that https://your-domain is accessible, tell me the result
BaoTa AI will automatically modify the Caddy config, open ports, restart the container, and apply for the certificate. After completion, visit https://your-domain, the browser top-left will show the small lock icon, no longer "Not Secure".
The certificate is issued by Let's Encrypt, Caddy will auto-renew, no manual management.
Ongoing Maintenance
After deployment, for daily questions just ask BaoTa AI directly, for example:
- "How to upgrade the dsh container to the latest version?"
- "How to view the dsh container's running logs?"
- "How to restart the dsh container?"
- "How to back up dsh's data?"
- "The dsh container is taking too much disk space, how to clean it up?"
It will give the corresponding commands based on your actual environment and execute them. Data is all stored in the project directory's ./data/, deleting the container or upgrading the image won't lose data; to back up, just copy the entire ./data directory.
What Tools Can Be Installed in the Container
The container comes with node 22, pnpm, python3, git, curl, jq, ripgrep, make/gcc (for compiling native modules), Rust, and other common tools pre-installed. The Agent can also use x-cmd to install more tools itself (no root needed), the installed data is also in ./data, survives restart.
Notes
- The current version of dsh has no multi-user isolation — everyone uses the same Basic Auth to log in and sees the same session and config. When the team shares it, don't store sensitive information, or have each person deploy an independent instance.
- Don't hardcode API Key in compose — use a
.envfile, the project already git-ignores it. - Agent works inside the container — what it sees is the file system inside the container, not your server's. To have it operate on a directory on your server, you need to add a volume mount in docker-compose, mapping the host directory into the container.
- Change password: edit
DSH_AUTH_PASSWORDin.env, thendocker compose up -d, the container will auto-regenerate the hash on startup.
How to Choose: One Table
| Your need | Pick which | Why |
|---|---|---|
| Open a browser every day to work with the Agent | Local Web UI | Intuitive interface, can see trajectory and approve |
| Embed in scripts / CI / scheduled tasks | Headless CLI | One command, run-and-exit |
| Embed Agent into your own program | Python SDK | Function-level call, can control session and events |
| Server long-term run / team sharing | Docker | Containerized deployment, auto restart, data mounted |
| Batch tasks need shared context | Python SDK | headless is an independent session per call, SDK can reuse |
A practical suggestion: most people can just start with the local Web UI. When you need automation, add headless; when you need to embed in a product, add SDK; when you need to go to a server, use Docker. No need to set up all four from the start — dsh's benefit is switching on demand, the foundation is the same set of things.
What you learned in this chapter
You pass if you can complete the items below:
- [ ] Know dsh has four deployment forms: local Web UI, Headless CLI, Python SDK, Docker
- [ ] Know the start methods and applicable scenarios of the four forms
- [ ] Can pick the right form based on needs — rather than only knowing
dsh web - [ ] Know that each Headless call is an independent session, to reuse context use SDK
- [ ] Know that Python SDK comes with a Node runtime, and is an independent instance from Web UI
- [ ] Can use the deepseek-harness-web-docker project to deploy dsh with Basic Auth on a server
- [ ] Can bind a domain + HTTPS to the deployed dsh (Caddy auto certificate)
- [ ] Know the Docker deployment notes: no multi-user isolation, keys in .env, path differences inside the container